Walk into any pet store’s aquarium section and the filter shelf stops you cold. Hang-on-backs, sponge filters, canisters, internal powerheads. Four different categories, a dozen brands each, and packaging that lists flow rates and media types you haven’t learned yet.
Most beginners grab the one that looks most like what they’ve seen online, hope for the best, and move on. A little context before that decision makes it a lot easier to get right.
Here is what the four main types actually are, what they do inside your tank, and the honest answer about which one you probably need.
What A Filter Is Really Doing In There
The obvious job of a filter is clarity. It pulls the floating particles out of the water so the tank looks clean. That part is real, and it matters, but it is the least important thing a filter does.
The filter’s real job is to house bacteria that process fish waste. Without that bacterial colony working around the clock, ammonia builds up in the water and becomes toxic to everything in the tank. Most fish problems are water problems. The filter is where that problem gets solved before it can reach the fish.
This is why the filter connects directly to the nitrogen cycle. The bacteria that do the work, the ones that convert ammonia into something far less dangerous, don’t float around in the water column. They need a surface to colonize. Filter media gives them that surface: the sponge foam, the ceramic rings, the bio-balls inside the housing. The bigger that surface area, the more bacteria can live there, and the more waste the tank can handle.
Filters handle three types of processing, and it helps to know all three.
Mechanical filtration traps the visible stuff: uneaten food, plant trimmings, fish waste in particle form. This is what makes the water look clear. It needs cleaning regularly, because a clogged mechanical layer stops working.
Biological filtration is the bacteria layer described above. This is the part you can’t see and can’t rush. A new tank’s filter houses no colony yet, which is exactly why cycling before adding fish matters so much.
Chemical filtration, usually activated carbon, pulls dissolved compounds from the water. It removes tannins and some odors and can help with certain medications. It is the most optional of the three, and most everyday tanks run fine without it after the initial break-in period.
The Four Types, And Who Each One Is For
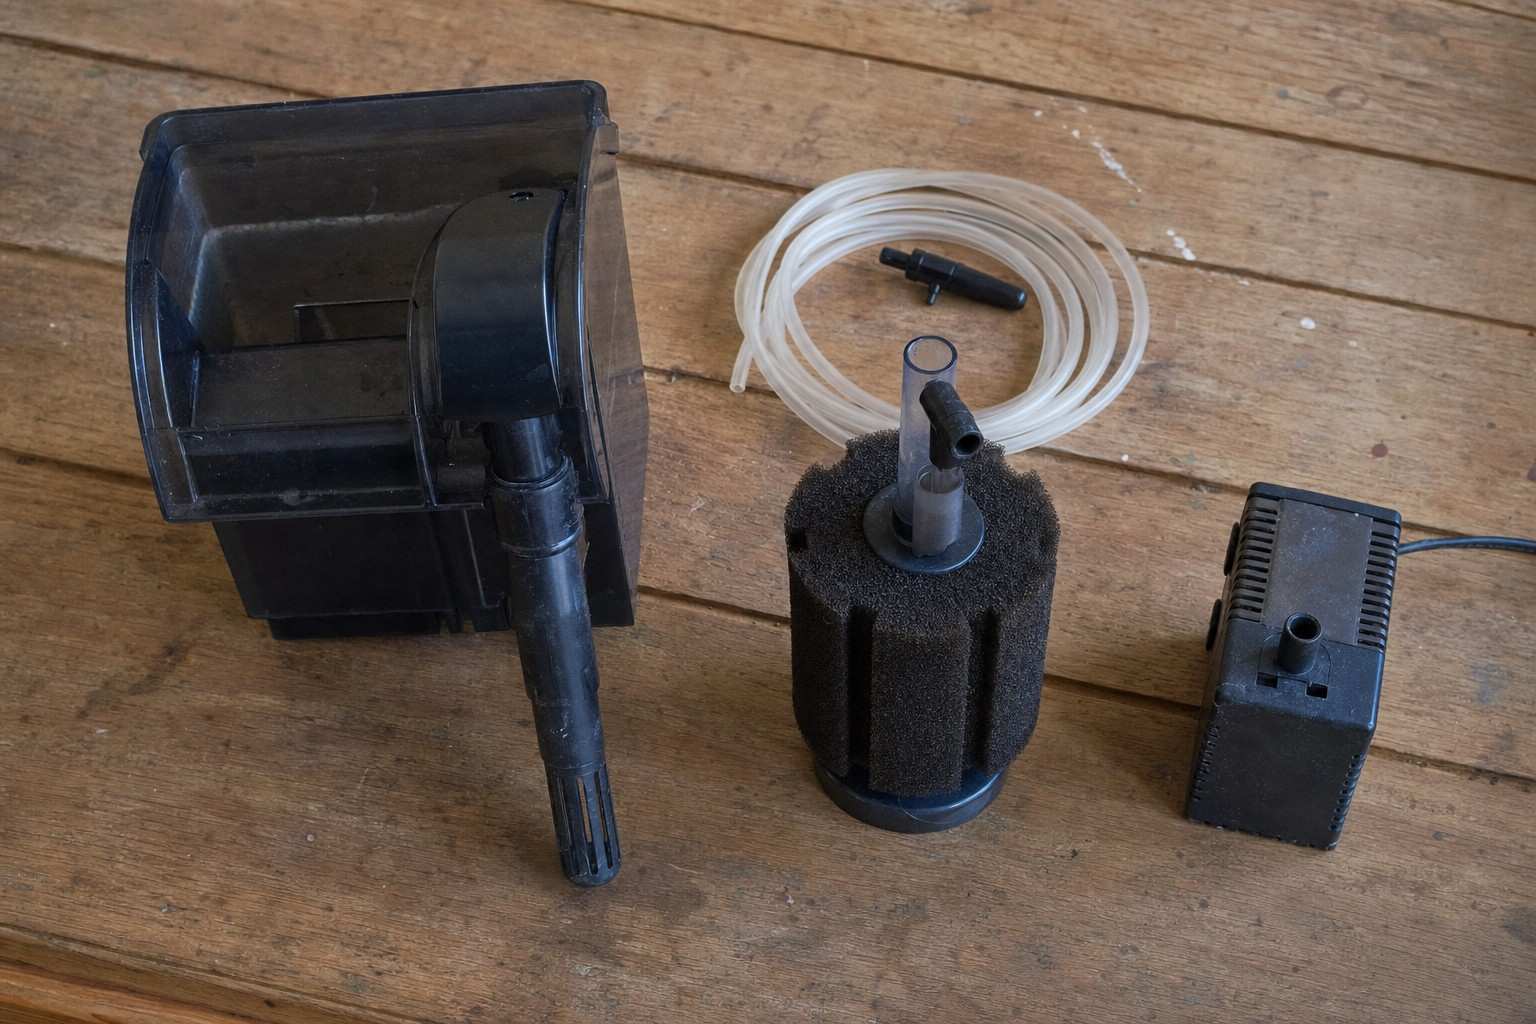
Sponge Filters
A sponge filter is the simplest design in the hobby. It is a foam block connected to an air tube, driven by an air pump that sits outside the tank. Water is pulled through the sponge, particles get trapped, and bacteria colonize the foam surface.
Sponge filters are cheap, gentle, and surprisingly good at biological filtration. The foam holds a lot of surface area relative to its size, which means the colony can grow large. The flow is slow and soft, which matters for tanks that house fry, shrimp, or fish species that don’t tolerate strong currents.
The trade-off is that an air pump is a separate purchase, and cheap air pumps hum. Hobbyists commonly mention this as the one thing they’d warn a new owner about: a small air pump on a nightstand at one in the morning is audible. A slightly better pump runs quieter.
A sponge filter suits small tanks well, typically under fifteen gallons, and is the standard recommendation for breeding tanks and shrimp setups. For a community tank with larger fish, it works but you’ll often want more flow than a single sponge provides.
Hang-On-Back Filters
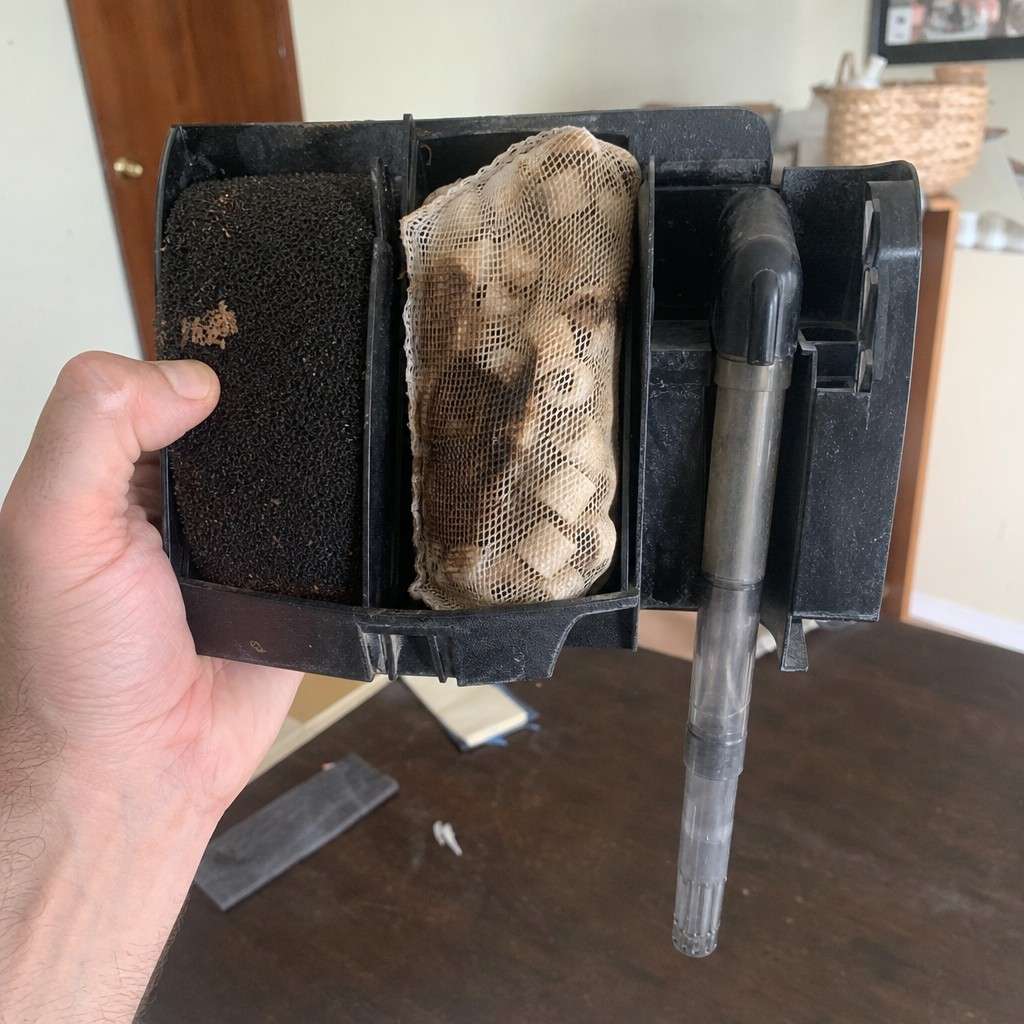
The hang-on-back filter, abbreviated to HOB, is the most common beginner filter in the US. It clips onto the back rim of the tank, hangs outside it, and pulls water up through an intake tube, passes it through mechanical and biological media, and spills it back in over a waterfall lip.
HOB filters are the default recommendation for most first community tanks, and they earn it. They’re straightforward to set up, easy to maintain, widely available, and affordable. The media cartridge pulls out for cleaning without getting your hand all the way into the tank. Most chain pet stores carry replacement cartridges on the shelf.
They handle tanks from about ten gallons up through fifty or sixty gallons comfortably, and they come in sizes to match. For the standard twenty or twenty-nine gallon starter community tank, an HOB is a solid, unambiguous choice.
The one thing worth watching: some HOB models come with proprietary replacement cartridges that you throw away and swap monthly. This removes the bacteria colony you’ve spent weeks building. Look for a model that lets you rinse and reuse the biological media separately. It’s a small thing that pays off every time you do maintenance.
Internal Filters
An internal filter sits fully submerged inside the tank, usually suctioned to the glass in a corner. It pulls water through its own foam and bio media and pushes it back out through a spray bar or directional nozzle.
They are compact and tidy, and they don’t add any hardware to the back of the tank. For small-to-medium setups, particularly when aesthetics matter and the tank sits in a visible spot, they do the job cleanly.
Internal filters are a reasonable pick for tanks up to about thirty gallons. They tend to be a step down in capacity compared to a same-priced HOB, so size up if you’re between options. Maintenance means reaching into the tank to pull them out, which some people find fine and others find annoying.
Canister Filters
A canister filter sits completely outside and below the tank, usually in a cabinet underneath. Water travels down through a tube into a sealed canister filled with media trays, gets processed, and is pumped back up and into the tank. They run very quietly and handle large tanks or heavily stocked setups without strain.
They are also the most complex to set up, the most expensive, and more than most beginners need.
A canister is worth considering when you’re setting up a tank over fifty gallons or adding a lot of fish. For a first twenty-nine-gallon community tank, the extra cost and setup complexity don’t buy you anything a good HOB couldn’t handle. Buy the simpler option first.
A Word On Sizing
Whatever filter type you choose, buy one rated for your tank volume or larger. Filter ratings printed on the box are generous; real-world performance on a stocked tank is always a little lower than the label suggests.
Many sources in the hobby suggest a filter should turn over the tank water several times per hour. That’s useful as a floor, not a ceiling. Don’t overthink the exact numbers. A filter with more capacity than your tank needs is forgiving. A filter that’s slightly undersized for the bioload will show it in your water readings.
If you’re unsure, size up by one bracket. A filter rated for forty gallons on a twenty-nine-gallon tank gives you room to grow and handles maintenance lapse better than one rated at exactly the size you have.
The One Maintenance Rule That Protects The Whole System
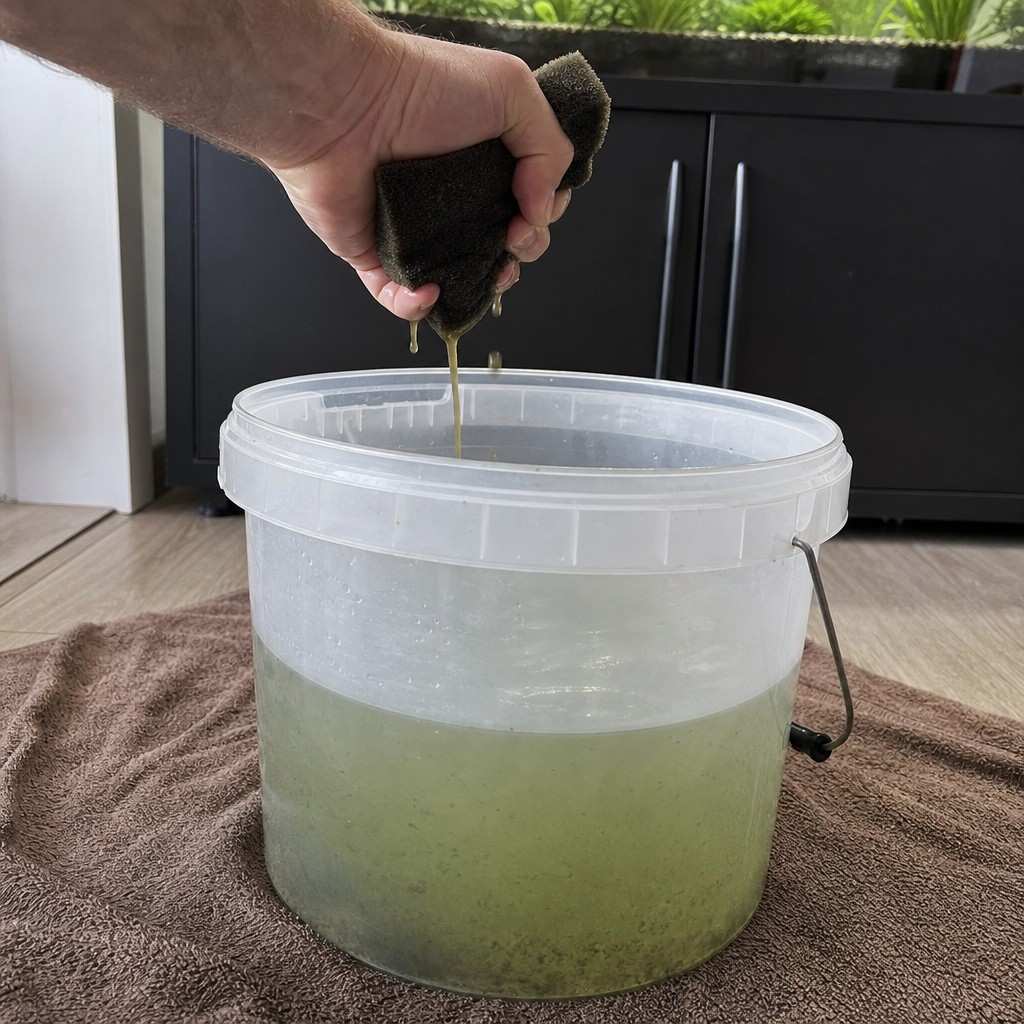
Everything built up in the previous sections collapses if you make one common mistake during cleaning: rinsing your filter media under tap water.
Tap water contains chlorine, and chlorine kills the nitrifying bacteria that live in your media. One enthusiastic rinse under the faucet and you’ve removed the colony you spent weeks growing.
So when the filter needs cleaning, rinse the biological media gently in a bucket of water you have just siphoned from the tank, never under the faucet. A standard aquarium maintenance routine walks through the wider upkeep; the filter-specific part is simply this.
The media is not supposed to look clean. It is supposed to stay alive.
Clean the mechanical layer, the coarse foam or floss that catches particles, more often. Leave the biological media alone except for that gentle rinse when it genuinely starts to restrict flow.
The Honest Steer
For a first community tank in the ten-to-forty-gallon range, the choice is really between a hang-on-back and a sponge filter. Either one is enough.
An HOB is the easier default. It handles a wider range of tank sizes, doesn’t require a separate air pump, and keeps the inside of the tank less cluttered. A sponge filter costs less upfront and excels in smaller tanks or any setup with delicate livestock. Both give your bacterial colony a solid home.
You don’t need a canister. Not for a first tank. The extra expense and setup time don’t improve the outcome for an ordinary community tank, and it adds complexity during the learning curve when simpler is better.
Pick the filter, run the cycle, and let the bacteria do their work. The invisible colony you grow in the first weeks is what keeps the fish alive, not the housing around it. A stable tank beats an impressive one.